Brainstorming:
At first, I started with these hurriedly scribbled notes:
“Excitement, Fighting an even match, Concentration.
A duel of wits and luck and strategy”
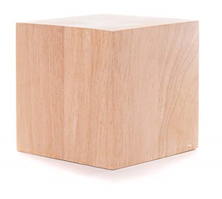
Then, I realized that I had these relatively large wooden cubes lying around in my dorm. I figured any polyhedron can become a die, so how could I use this one?
The assumptions I had about a D6 die were that the outcome of a roll was random, and that the faces were fixed. I realized that since these wooden cubes were currently naked, I could switch up both of those assumptions to some extent.
I wanted my game to involve these huge dies, and for them to be modifiable. This immediately reminded me of an existing board game called Diceforge, in which, as the name suggests, you upgrade your dice over the course of the game. The main problem that I had with that game, however, was that my upgrades did not feel meaningful, and my success was still up to fate. I needed to do more than just be able to switch out faces, I needed the faces to somehow work with each other. Instead of just a flat upgrade (switching a 1 for a 7 for instance) I wanted upgrades that might work with other faces. I wanted to make an engine building game.
Stepping backwards a bit and looking back at my technology, I wanted to come up with an aesthetic/setting that could go with both huge dice and engine building. I listed out the qualities of my game as it stood currently:
- Lumbering, huge
- Modifiable
- Primary source of conflict/board control/presence
A few ideas came to mind from these three points:
- Giant Beasts
- Mobile Cities
- Ancient Technology, Humongous Golems
For each point I kept thinking “cities”, “cities”. I wanted cities on giant beasts, cities on humongous golems. Then I realized that I should just strip out that fluff: it’s a game about Giant Moving Cities.
I settled on the theme, but with a few Google searches I remembered that there was both a book and a movie about this concept (Mortal Engines), and it’s not an entirely new idea either. Thankfully, I didn’t encounter any games about controlling said cities, so I safely nestled in and began developing the idea further.
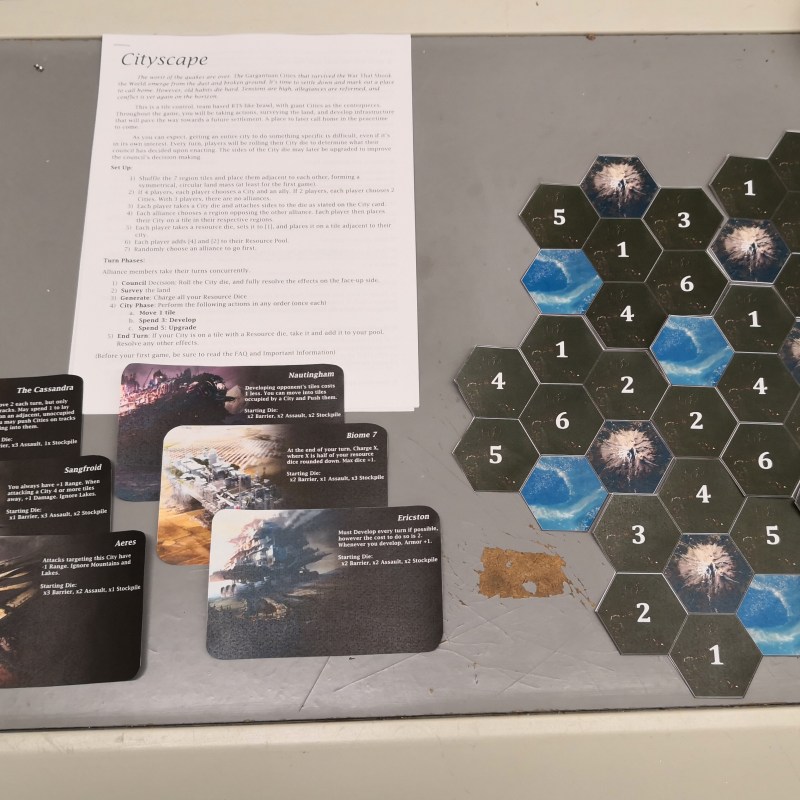
The worst of the quakes are over. The Gargantuan Cities that survived the War That Shook the World emerge from the dust and broken ground. It’s time to settle down and mark out a place to call home. However, old habits die hard. Tensions are high, allegiances are reformed, and conflict is yet again on the horizon.
This paragraph flowed out, and with that, the game was born.
Initial Set of Rules:
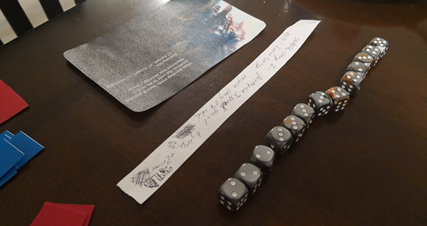
A collection of scribbles legible and cohesive probably only to me:
- 1 v 1 Duel. Both City Dice have 3x Open Fire, 3x Barrier
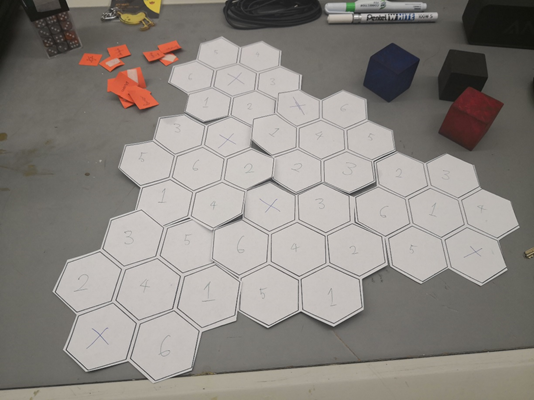
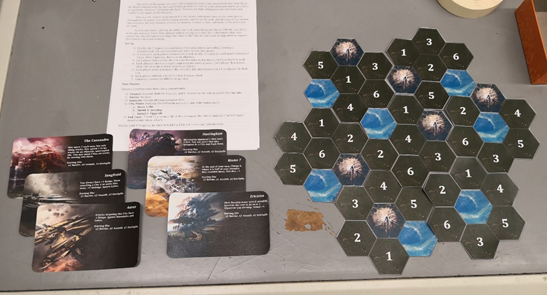
- Region tiles consisting of 7 hexagonal tiles with numbers 1-6, and one obstacle (X). 6 of these region tiles create the board.
- You start with 3 dice already in your Resource Pool, set to: [6][3][1]
- Use smaller dice as resources. Survey: At the beginning of every turn, roll a resource die twice, the first result being where the die will go, the second being what value. (if I roll a 3, I look at the board, pick an uncovered 3 that’s closest to my city. Then I roll it again. Let’s say it was a 5, I put it on that tile with 5 face up.)
- Start of turn, increment all of your Resource Pool dice by 1
- Next, roll the City Die and resolve its effects. You can Spend 2 to turn the die one side over to get a more desirable result.
- Next is the City Phase
in which you can do the following:
- Move 1
- Spend 3 to Develop (claim a tile, which will later be counted towards victory)
- Spend 6 to Upgrade your die (picking from and available upgrade list)
- Pass turn, if City ends its turn on a tile with a resource die, take it and add it to it’s Resource Pool.
When you Spend, it must be from one die. For example, if you had [4][2][1], to Spend 3, you must reduce the [4] die to [1], resulting in [1][2][1], or expend the [2], then expend the [1] die to cover the rest of the cost, so that you’re left with just [4]
The same is for taking Damage. You can choose what die takes an amount of damage, but it must be from the same die.
The game ends when someone can’t Survey anymore (because all the tiles have been covered up), or because a City perishes.
Whoever has the most developed tiles wins.
Upgrade Glossary:
- Open Fire – Range 5, Deal 3 Damage
- Barrier – Defend against 3 Damage until start of next turn
Playtest #1 (2/1/19):
Playtesters: Myself, a 22 year old guy with many years of experience with complex board games.
This playtest was cut short, I knew it would be a silly game because there weren’t any upgrades, but what I wanted to make sure was that changing sides and rolling and moving the big die was fun. The map size seemed ok and Surveying was a surprisingly balanced way to distribute resources.
I liked how the resources I used to Develop and Upgrade were also my hitpoints.
Changelog:
- Formalized turn
structure:
- Add 1 to all Resource Dice
- Roll to Survey
- Roll City die
- Spend 2 to shift die one side
- In any order
- Move 1 space
- Spend 3 to develop
- Spend 6 to upgrade
- Pass turn, gain resource die on occupied space
- Start with [4][3][1] instead of [6][3][1] (I liked working up to an Upgrade. I wanted the game to feel a little bit like a turn based RTS)
- Start: Place two [1] Resource Dice adjacent to your City (to teach players how to gain Resource Dice, and also to make it slightly more balanced, reducing the chance that Survey drops a large boost close to a City very early in the game)
- Added Upgrades
- Howitzer – Range 7, 3 Damage
- Big Laser – Range 3, 5 Damage
- Made it a team based 2v2, instead of 1v1. Planned change to increase decision complexity and add teamwork.
Playtest #2 (2/1/19)
Playtesters: Myself
I decided early on that one of the teams I played would be as defensive as possible, while the other was as offensive as possible.
The defensive Cities focused on laying down Developments, picking up resource dice to improve their economy. The offensive Cities focused on rushing in and fighting as much as possible, not Developing as much.
Problem: By the end, the most aggressive strategy couldn’t beat the campy strategy. Picking up dice at the end of turn was essentially healing for a large amount, and even with two Cities ganging up on one, it wasn’t theoretically likely that it would ever go down. Stockpiling dice and never upgrading was also a viable strategy, which isn’t what I was intending.
I had to ask myself if I should help out Aggro strategies, and how I might do it. Should you be forced to Develop every turn? Is Develop even a good mechanic if I do that? Stepping back, I felt that Develop was a good mechanic. It reduced the size of the board in a way, causing Resource Dice to be spawned closer and closer in the middle, forcing Cities into conflict eventually.
Changelog:
- Cost to Develop is now 2 instead of 3 (This makes it easier for Aggro strategies to occasionally commit to it), and Develop must be on the current tile, not adjacent.
- Cost to Upgrade is now 5 instead of 6 (Losing dice is bad in general, and being forced to lose one to Upgrade feels bad no matter what strategy you’re pursuing. Now that it’s 5, players are incentivized to get a die to [6] and spend 5 to Upgrade so that they can keep the die they used to spend.)
- Remove Spending
2 to Shift the City Die over a side. It made rolls unexciting because I could
just change to whatever side I wanted. It became more of a tax for not rolling
the side you wanted.
- Add new Upgrades that do shift the City Die in a direction
- New Upgrade
Glossary:
- Open Fire – Range 4, 3 Damage
- Barrier – +3 Armor (Armor is the new term for blocking damage)
- Stockpile – Charge 2 (Charge is the new term for incrementing dice. Cannot Charge the same resource die twice with one Charge)
- Broadside – Range 2, 6 Damage (Range down, Damage up to feel more impactful but trickier to use)
- Howitzer – Range 5, 2 Damage, (→) (Arrows allow you to turn the City Die towards that side, allowing you to chain effects and build an engine) (Range 7 was basically the entire map, Range 5 was more reasonable)
- Highrise – +2 Armor, (→)
- Eviction – Range 2, Push 1, If onto an obstacle, deal 2 Damage, (→)
- Agile – Charge 1, Move 1, (←) or (→) (Sides with multiple arrows allow you to choose one of the directions, adding a new choice while playing and upgrading your City Die)
- Conversion – Spend 3: Get a [1] , (←) or (→) (akin to ‘ramping’, committing resources to increase the potential of your economy)
- Starting Dice changed from 3x Open Fire, 3x Barrier; to 2x Open Fire, 2x Stockpile, 2x Barrier. (More interesting than a 50-50)
- Instead of starting with 2 [1] Resource Dice adjacent to your city, only start with 1 [1]. (2 was just too many, didn’t feel right)
- Survey change: Maybe it was too imbalanced to make Resource Dice come in randomly between [1] and [6]. Changed so that during Survey, Resource Dice spawn as [1]s, so that players always pick up the same amount of resources over the course of the game. More level like in most RTSs.
- There should be a way to interact with opponents’ Developments. Players can now Spend 1 more than usual to Develop an opponent’s Development.
Playtest #3 (2/1/19)
Playtesters: Yep, still me.
Successfully completed a game. It’s fun, but the Cities were too similar strategy-wise, as much as I tried to vary them. It’s about time I introduced asymmetry to the game. It was too balanced before, so next I will introduce unique Cities.
Arrows/Engine building was a success, very satisfying to think of how to best Upgrade my City die.
Stockpile was a good change to the Starting Die. Open Fire beats Stockpile, which beats Barrier, which beats Open Fire.
I really didn’t like the change I made to Survey. Although it was more fair that new resource dice spawned on the map as [1]s, it was less exciting than rolling a [6] and having it land close to you or an ally. It was always more beneficial to get the closest die, as opposed to trekking a little to get that sweet [6] drop.
Changelog:
- Spend 2 to Develop felt more like an obligation. Reverting it to Spend 3, however adding a certain effect to a Unique City…
- 1 Reroll per player per game. (Sometimes you’ve been having bad luck, and you really have a good opportunity right now or something)
- Unique Cities (I didn’t come up with their names until playtest #6 but
for the sake of knowing which-is-which in documentation, I will include their
names now):
- (Ericston) – Must Develop every turn if possible, but the cost is 2. Starting Die: x2 Barrier, x2 Open Fire, x2 Stockpile
- (Biome 7) – At start of turn, Charge X, where X is half of your resource dice, rounded down. Starting Die: x2 Barrier, x1 Open Fire, x3 Stockpile
- (Sangfroid) – Your attacks have +1 Damage and +1 Range. Starting Die: x1 Barrier, x3 Open Fire, x2 Stockpile
- (Nautingham) – You can Develop opponent’s Developed tiles for 1 less. You can move into tiles occupied by other cities. If you do push 1, and if into an obstacle, deal 2 damage. Starting Die: x2 Barrier, x2 Open Fire, x2 Stockpile
Playtest #4 (2/1/19)
Playtesters: Me again. Woo, long night huh.
(Ericston) + (Biome 7) vs (Sangfroid) + (Nautingham)
The team on the left I chose to pilot very defensively, and the team on the right I chose to pilot very aggressively. The unique effects of each City affected how I wanted to build their dice, and how I wanted to strategize with and against them. (Ericston) was designed so that players would have to respond one way or another to their ceaseless board development, and I think it worked. (Nautingham) was designed to naturally counter (Ericston), which also worked, being able to convert some of their tiles. The end score was very close and I applied myself much more than the previous game.
I noticed a sort of
Rock-Paper-Scissors emerge: Defense > Offense > Push >
Defense could mitigate a lot of the damage from Offense. Push could move
Defensive Cities into places they don’t want to be. Offense could deal lots of
damage to Push because they have less Armor generally.
This emergent strategy was very intriguing, so I decided to support it by
buffing Push so that it does unblocked damage if Cities ever crash into
obstacles, getting through their thick Barriers.
Changelog:
- Made new region tiles. I liked the obstacles but there were too few of them, so now every tile has 2: a Mountain and a Lake.
- (Biome 7) was a little too powerful, being able to Charge dice at the start of turn. Changed so that it’s at the end of turn.
- (Sangfroid) was designed to be a long-range attacker, but I realized I could just get in there and Broadside anyways. Changed the +1 Damage to only apply at Range of 4 or more, so that players would have to play differently than other offensive Cities, but get rewarded for it. Gave it immunity to Lake for better maneuverability.
- (Nautingham) was great at Pushing, and I decided to errata Push so that in general, if you Push a City into an obstacle it isn’t immune to, it takes 2 Unblocked Damage.
- (Ericston) felt a little bit underpowered. I added: Whenever you Develop, Charge 1.
- Clarification: (Ericston) must Spend 4 to Develop an opponent’s tile.
- Clarification: Each side of the City die may only be resolved once per turn, so no infinite loops.
- New Cities:
- (Aeres) – All attacks targeting this count as having -1 Range. Ignore Mountains and Lakes. Starting Die: x3 Barrier, x2 Open Fire, X1 Stockpile
- (The Cassandra) – May Move 2 during its turn, but only along tracks. May Spend 1 to lay tracks on an adjacent unoccupied tile. You may push Cities that are on tracks by moving into them. Starting Die: x3 Barrier, x3 Open Fire
- New end game clause: When resource dice run out, game ends at the end of the next turn. (Game would go on for a little too long, and this seemed like a reasonable way to set a clock)
- Added to Upgrade
List:
- Recycle – Charge 2 to one die, (→)
- Raze – Move 1, pick up resource die on current tile, (↓) or (→)
- Pave – Move 1, ignoring terrain, (↓) or (→)
- Printed out color City cards and Region Tiles.
Playtest #5 (2/3/19)
Playtesters: Me, a 22 year old highly experienced in my own game.
A 24 year old gal with a good amount of board game experience. Has not played
my game yet. (Ericston)
A 22 year old guy with a good amount of board game experience. Has not played
my game yet. (The Cassandra)
(Ericston) + (The Cassandra) vs. (Sangfroid) + (Biome 7)
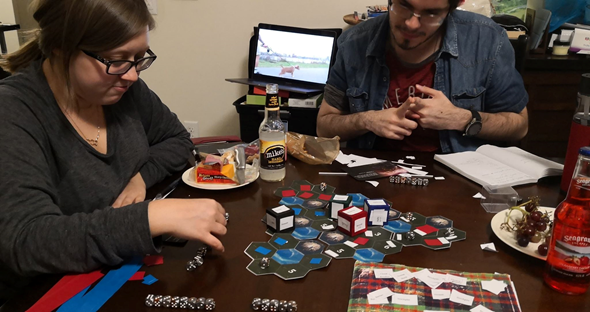
This is the first time I played my game with others. I wanted to try out the teamwork aspect, so instead of a battle-royale, I made it me vs them. Although I did not yet have a rulebook, the rules were easy enough to grasp and they had little trouble keeping up with it. I handed them an Upgrade Glossary and the turn order for reminders.
They did pretty well, it was a close game: 12 points to 11. (Ericston) decided to play defensively. They Upgraded away all of their attack options and focused on Conversion, Agile, and Highrise. (The Cassandra) There were some balancing issues, for instance Conversion (Spend 3: gain [1]) ended up being overpowered, leaving one City untouched for too long can lead to them hoarding a massive amount of resource dice, and Range wasn’t too relevant for most weapons because the map was so small. Some tweaks needed to be made, but they enjoyed the act of upgrading their Cities, and they thought it was surprisingly fun for an early prototype.
(The Cassandra) player dubbed his strategy Broadside-train. I hope to foster more strategies and “build targets”, as they say in the RTS genre.
Changelog
- New title for the game: Cityscape
- Suggestion that
I should name Cities soon, as it helps characterize and differentiate them
more.
- Officially: Ericston, Biome 7, Sangfroid, Nautingham, Aeres, and The Cassandra
- Removed Conversion, Removed Agile.
- Make Damage hit the Lowest Dice first. When you can choose where the damage goes, at a certain point Cities become too tanky to take down. It also makes more sense, why does the defender get to choose where to take the Damage?
- Cap resource dice to 6 max.
- Ericston’s last buff was too strong. Instead of Charge 1, changed to +1 Armor.
- Gave Biome 7 +1 max resource dice to compensate with change. Now it is aptly named, having a max resource dice count of 7.
- Instead of having only 2 team colors, make Development tokens for all players. The reason is because if a City perishes, there can now be a consequence other than just the game ending: When counting up their Developments, theirs count for half, rounded down.
- I want resources to feel more precious. There’s currently a positive feedback problem, not sure how bad it is. (Then again, all RTSs have that same problem as well)
- Added another region tile to expand the map, lengthen the game a little, and make Range more meaningful.
- Changed Range to
have a lower bound as well:
- Open Fire – Range 1-4
- Artillery – Range 4-5
- Etc.
- The Cassandra Starting Die: x2 Barrier, x3 Open Fire, x1 Stockpile (it was too drastic and different to not have Stockpile)
Playtest #6 (2/4/19)
Playtesters: Me.
The Cassandra + Ericston vs. Nautingham + Aeres
In preparation for the coming playtest session at the ETC, I created a rulebook that hopefully could be read and understood by new players. I’m playing another one on my own to feel out my changes. I really like the Damage change to hit only the lowest dice.
The extra map space felt decent. The City changes seemed fair. I had a few minor tweaks, but I wanted to see what tomorrow’s reception would be like first before I enact anything drastic.
At this point, I was mulling around some ideas to further differentiate the Cities. I’ll get to my solution later.
I now had enough playtests to say that the playtime is around 30-60 minutes, accommodating 2-4 players.
Changelog
- Created a comprehensive Rulebook.
- Clarification: Cannot Develop on Mountains or Lakes
- Clarification: Two Cities cannot occupy the same space, not even Aeres, the flying City.
- Push addition: If you were to Push a City into another City, Push both instead and deal 2 unblocked damage to them.
- Assigned approximate difficulty to Cities:
- Easy: Ericston, Biome 7
- Medium: Sangfroid, Aeres, Nautingham
- Hard: The Cassandra
- Upgrade changes:
- Artillery – Spend 1: Range 4-5, 4 Damage
- Broadside – Spend 1: Range 1-2, 6 Damage
- Secondaries – Range 1-3, 2 Damage, (→)
- Open Fire – Range 1-3, 3 Damage
- Support – Range 1-3, Give another City Charge 2, (←) or (→)
Playtest # 7 (2/5/19)
Playtesters:
A 24 year old gal, peer and Undergraduate with decent amount of strategy/tactic game experience. Has not played my game. (Nautingham)
A graduate guy, decent amount of experience with complex board games. Has not played my game. (Aeres)
A graduate guy, some amount of strategy/tactic game experience. Has not played my game. (Ericston)
A graduate gal, not much board game or strategy/tactics experience. (Sangfroid)
Nautingham + Aeres vs. Ericston + Sangfroid
Things to note: this was an unfortunate playtest session. I was second to last to playtest and so everyone was a bit rushed. The graduate gal left halfway through the instruction reading to go to the bathroom, and so came back mostly confused.
Otherwise, the rulebook was mostly a success. I had to guide the learning a little bit but players quickly learnt the play order and the mechanics. Note to self- It’s important to introduce mechanics slowly, sometimes even over the course of a game.
Sangfroid was piloted by someone who was not my target audience, who Also missed most of the instructions. The Ericston player ended up taking most of the reigns, explaining concepts and giving suggestions. Aeres and Nautingham both were solid players, so it was understandable that they won. Sangfroid was rushed down and destroyed.
Mistakes: Sangfroid never upgraded and was just low on dice from getting bullied. Ericston expended dice instead of saving up so that they could upgrade or develop without losing their resource dice in the process. Neither Aeres nor Nautingham used upgrades with arrows. Nautingham, a brawler by design, wandered off into the distance.
Although we were rushed, players seemed engaged and wished to play again another time. They enjoyed the opening paragraphs of the Rulebook, which was the description of the game and a peak into the lore. They suggested making reminder cards with Upgrade Glossaries and Turn Order on them. Ranges seemed to be in a good place. Velcro was suggested to replace the tape I was using to attach sides to the City Dice.

Changelog:
- Ericston – Remove the Must clause. Just incentivize Developing by being lower cost and also rewarding with +1 Armor. Now players can choose not to Develop sometimes. It was getting difficult to define “Must develop if possible” anyways.
- Change turn
order (looking at what players were most excited to do first during their
turn):
- Generate
- Survey
- City Die
- City Phase
- Refined Rulebook to include a QuickStart Guide. Introduces essential mechanics slowly and during the game, allowing players to ask questions about more specific circumstances, rather than being inundated at the beginning.
- Added map markers for City Dice. (Players sometimes forgot where their City was after they rolled the City Die.)
- Added Generator to the City Cards to further illustrate how the Resource Dice pool works. Added artist attributions.
- Reroll is a welcome mechanic, it’s just hard to remember. Added it to the reminder cards.
- Changed the layout of the map so that it’s longer. Other map layouts can be experimented with by players, but the first game should be this new version because it naturally gives both teams more time to collect themselves and get a few Resource Dice or Upgrades before they collide.
- Obtained Velcro, to replace the unwieldy tape.
Playtest #8 (2/8/19)
Playtesters: Me
The Cassandra + Aeres vs. Biome 7 + Sangfroid
Testing again casually. I wanted to pay attention to what I needed to know to start playing, so that I could change the Rulebook accordingly.
It felt really good to play, even though it was against myself. Piloting The Cassandra was very exciting, the empowered Move allowed me to dart in and out of Sangfroid’s range. Once, I distinctly remember, as The Cassandra, I was low on dice and I knew that if I tried to flee by going away from the two Cities, I would more likely than not get hit by Artillery (I knew that their dies were biased towards that result), which would end the game. I chose to charge towards the two Cities to stay out of danger, and lo and behold it worked. They both rolled eventually into Artillery and I was spared for another turn. They also burned their rerolls earlier so they could not take advantage of my current weakened state.
Aeres generally stayed back and laid down Developments to keep up with Biome 7’s Developments. Biome 7 bought several Supports to bolster its teammate since it itself was in a good spot for most of the game. I should have played The Cassandra a little more conservatively to start. I was burning a lot of gas on laying tracks, taking damage, and retreating. Laying the groundwork early was a good idea, but I should have retreated earlier. Biome 7 and Sangfroid took advantage of this loss of tempo and swung out a victory.
Changelog:
- Sangfroid – Due to the addition of new Upgrades, I decided to change Sangfroid so that it has +1 Range in general instead of just when attacking.
- Aeres is on my list for needing changes…
- Ericston – New change: Whenever it Develops, Brawl: Range 1-2, 1 Damage, Or +1 Armor. (This made Ericston less one-track and more interesting. It characterized it more accurately and gave it a new playstyle and difficulty level.)
- Nautingham is now Hard (its strategy is not often thought of by new players), Aeres is now Easy (its abilities focus on having an easier time).
- Based on previous playtests, refined Rulebook again to streamline the learning process.
- Created reminder cards with Upgrade Glossary and Turn Order.
Playtest #9 (2/10/19)
Playtesters: Me (Nautingham)
An undergraduate guy, some experience with board games and tactics/strategy. Has not played before. (Biome 7)
An ungraduated gal with some experience with tactics/strategy. Played once before. (Sangfroid)
An undergraduate guy with a good amount of board game and tactics/strategy experience. Has not played before. (Aeres)
Things to note: This time I was the last game to playtest in our playtest session, our ordered food came an hour late, it was 8:30 PM, everyone was tired and hangry, and one of the Playtesters had to leave early. It was NOT a time to be playing games. Thankfully, my peers still tried to apply themselves but I knew that they were stressed and running out of time. I’m keeping it anonymous for this reason, but (Biome 7) was basically absent and did not listen to rules or even read his City card, which frustrated me as this would be the last playtest session I could have with people other than myself.
On the positive side, my revisions to the Rulebook worked really well. I got (Aeres) to read the Rulebook and it introduced major concepts while the game was getting started. Although he never played the game before, he quickly picked up the rules. This may or may not be because he was also the target audience for my game, something to be seen with later playtests.
(Biome 7) left early, and so Undergraduate Gal piloted both Cities. The game was decided a little earlier because my team was being productive while the others fumbled and didn’t pick up Resource Dice for a while (more specifically, Biome 7). (Sangfroid) tried but my team decided early to target Sangfroid so this combination of superior strategy and play, lack of support and engagement from teammate, and bad luck led to their downfall.
Sangfroid did recognize that she needed to hit Nautingham instead of Aeres to gain an advantage. Aeres recognized that their City was very strong defensively, so he played in a way that supported that.
I did note how they got jammed up a little on their side of the map. The obstacles were arranged in a bad way which restricted movement too much. I revise this later.
They also acknowledged that this was not the best way to playtest the game, as they were stressed, out of time, and hungry. Despite this, they had fun and really want to sit down with the game while unstressed and attempt to master it. The Velcro was a big success, they immediately commented on the satisfying tactile element to the game.
Changelog:
- A few of my region tiles were boxing in players unnecessarily. Shifted around Mountains and Lakes so that no matter what random layout, there won’t be a blockade that funnels you into one route very early. (Just needed to make Lakes and Mountains not be adjacent to each other on a single region tile)
- Reduced Generator max dice by 1 (to reduce tankiness of Cities and also lengthen the game a little during more campy and outlier games.)
- Changed Biome 7 to Biome 6
- Aeres – Now needs to Spend 1 at the end of its turn to stay afloat or perish. (Aeres needed a nerf for a while, I just couldn’t come up with a solution until now. It was a defensive City that was resistant to the Push strategy, the strategy that I designed to counter Defense. Now it has to pay for its thick hide every turn, which is Damage in a different sense.)
- Sangfroid – Buff so that +1 Damage to Cities 3 tiles or more away instead of 4. (Sangfroid was supposed to do well against Aeres, but Aeres more often just hard countered it. This opens up Broadside-Sangfroid again, but it’s still a difficult combo to pull off so I think that it’s a fine change.)
- I wanted to unveil these Unique Upgrades to players who had played my game at least once, as it was the next level of decision making that I wanted to introduce, kind of like the tech tree in an RTS, however I could never find a comfortable time to play the game multiple times with a group. Nonetheless, even though I could not play with these upgrades, I showed them to players and they thought it looked like a great and enticing addition that would have spiced up the current game:
Should you choose to play with them, each City has two unique Upgrades that they can choose from. Each City may only choose one of the two and can only do so after they have at least two other upgrades.
Ericston:
- Double Time: Move 1, Spend 3: Develop (spend 4 if developing an opponent’s tile), (→)
- Pathfind: Move 1, Pushing Cities, Charge 1, (→)
Biome 7:
- Forcefield: Spend X: Range 1-2, You and another City gain half X Armor (rounded up)
- Fusion: Charge All
Nautingham:
- Omni: (←) or (↓) or (→), This side may be resolved twice per turn.
- Sunder: Spend 3: Remove everything from an adjacent tile. If there was a City, Push it and deal 2 Damage ignoring armor.
Sangfroid:
- Cloud Breaker: Charge 1, Spend 4: Range 3 in a line, 4 Damage ignoring armor.
- Tracking Shot: Range 2-3, 3 Damage, (↓) or (→)
Aeres:
- Carpet Bomb: Spend 2: Move 3 in a line, 3 Damage
- Burners: Move 2 in a line, (←) or (→)
The Cassandra:
- Express: Spend 6: Refresh your City die and roll again
- Trail Blaze: Move 2, You may lay tracks along the way spending 1 each, (→)
Cityscape (Rulebook)
The worst of the quakes are over. The Gargantuan Cities that survived the War That Shook the World emerge from the dust and broken ground. It’s time to settle down and mark out a place to call home. However, old habits die hard. Tensions are high, allegiances are reformed, and conflict is yet again on the horizon.
This is a tile control, team based RTS-like brawl, with giant Cities as the centerpieces. Throughout the game, you will be taking actions, surveying the land, and developing infrastructure that will pave the way towards a future settlement. A place to later call home in the peacetime to come.
Set Up:
- Shuffle the 7 region tiles and place them adjacent to each other (see below).
- Choose a City. It’s recommended to pick
Easy/Medium Cities to start (see back of City)
If 4 players, each player chooses a City and an ally. If 2 players, each player chooses 2 Cities. With 3 players, there are no alliances. (Give out reminder cards) - Each player takes a City die and attaches sides to the die as stated on the City card.
- Each alliance chooses a region on the far sides of the map and places their City on a tile in their respective regions.
- Each player takes a resource die, sets it to [1], and places it on a tile adjacent to their city.
- Each player adds [4], [3], and [1] to their Generator.
- Randomly choose an alliance to go first. (Before you begin your first game, read the QuickStart guide next.)
QuickStart Guide
You start with [4] [3] [1] dice. The turn phases consist of:
- Generate
- Survey
- Council
- City Phase
- End Turn
The first phase is Generate. To do so, Charge all of the resource dice in your generator by incrementing them by 1. You should have [5] [4] [2] now.
Next is Survey. To do so, roll a resource die from the pile. Look for an Undeveloped, Unoccupied tile with a number that matches what you rolled closest to your City. Roll the resource die again and place the die on that tile with that result facing up. Your City is scouting the land for resources, looking for where and how much.
If there are no tiles that match the first result, place the resource die on the farthest Undeveloped, Unoccupied tile instead. If you still cannot, the game ends.
Next is Council. As you can expect, getting an entire city to do something specific is difficult, even if it’s in its own interest. Every turn, players will be rolling their City die to determine what their council has decided upon enacting.
Now that that’s resolved, it’s the City Phase. You can perform the following in any order:
Move 1 tile, Spend 3: Develop, Spend 5: Upgrade.
- You can move the City 1 tile, so long as it’s an Unoccupied tile and not a Lake or a Mountain.
- You can Spend 3 to Develop the tile your City is currently on, placing the groundwork for future settlements. These are the game’s victory points. At the end of the game, each Alliance’s developed tiles are totaled and the one with the most wins. You can Spend 4 to Develop an opponent’s tile.
- You can Spend 5 to Upgrade your City Die. You can remove and replace a side with an available upgrade, rotating as you wish. You might be wondering what the arrows (→) are for. When you roll the City die and the face-up side is Secondaries, for example, do the attack and deal the damage, but afterwards turn the City die so that the side the arrow is pointing to is now face up. Resolve the effects on that side as well. This effect can chain!
If you’re done, you can End your turn. If the tile you’re on has a resource die on it, your City digs it up and adds it to its Generator. Resolve any other effects, and now it’s your opponents’ turn.
Alliance members can take their turns concurrently.
The game ends when a City perishes, or you can no longer survey (there are no more resource dice left, or all the spaces are covered up. Cities, Developments and unclaimed resource dice cover up numbers.) Count up all of the developed tiles on the board. Halve the count of a perished City.
You should have everything you need to know to get started. Look through the FAQ later for questions bound to come up like: Spending, Damage, Armor, Pushing…
FAQ
Q: How does Spending work?
A: You must spend from a single resource die, but unlike Damage, you may choose from which die to subtract from. For example, if you spend 2 and you had [4][3][1][1], you could spend from the [4] die or the [3] die, or expend both [1]s.
Q: How does Damage work?
A: If you take unblocked Damage, subtract
from your lowest dice an amount
equal to the Damage you took. For example, if you took 3 Damage and you had
[4][3][1][1], you should end up with [4][2] after Damage. A chain is only as
strong as it’s weakest link! A City that
takes Damage exceeding the amount that they can subtract from their dice
perishes.
Q: How does Armor work?
A: Armor is what you subtract from first
when taking Damage, before Damage reaches your Resource Dice. If Damage says it
ignores Armor, don’t subtract from Armor and deal the Damage straight to the Generator.
Armor can stack, and it lasts until the start
of your next turn.
Q: What is the Generator?
A: It is the power that sustains your City. Every turn during the Generate phase, all your dice increment by 1. These are the dice that you will Spend and take Damage from (see below). A City can have a maximum of 6 dice in their pool.
Q: How do you Survey?
A: Roll a resource die. Look for an
Undeveloped, Unoccupied tile with a number that matches what you rolled closest
to your City. Roll the resource die again and place the die on that tile with
that result facing up. If there are no tiles that match the first result, place
the resource die on the farthest Undeveloped, Unoccupied tile. If you still
cannot, the game ends immediately.
Q: How does Pushing a City work?
A: Displace the targeted City so that it occupies a new tile that is further away from you than where it was before. If a City is pushed into a Lake or a Mountain that it isn’t immune to, they take 2 Damage ignoring armor. If a you were to push a City into another City, push and deal 2 Damage ignoring armor to both. A City cannot be pushed off the map.
Q: How do you Develop?
A: Place a token with your City’s color on
the board on the space it currently occupies. You may Develop on a tile developed by an opponent by Spending 4 instead.
Q: How do you Upgrade?
A: Choose an available side from the upgrade pile and replace a side on your City die, rotating to whatever orientation you wish. Think carefully, it cannot be adjusted later aside from replacing it.
Q: What is Charge X?
A: Choose X amount of resource dice and
increment them by 1. They cannot be the same die unless otherwise stated.
Q: What are those arrows on my upgrades?
A: When you roll your City die and land on
this side, resolve all of its effects and then turn the die so that the side
the arrow is pointing to is facing up. Then resolve that side’s effects. This
effect can chain! If an arrow has multiple directions, you may choose which
direction to turn towards. All City die sides can only be resolved once per
turn.
Q: How exactly does +/- to range work?
A: Lets say you have Artillery, Range 3-4.
+1 would result in 3-5, while -1 would result in just 4. A range of 1-3 would
become 1-4, or 1-2 respectively.
Q: What happens if I pick up a resource die when I already have the maximum amount of resource dice in my pool?
A: Add the number to your lowest die and return the one you picked up to the pile!
Q: When does the game end? Who wins?
A: When a City perishes, or you can no
longer survey (see below), the fighting ends immediately. No more! Hasn’t
there been enough suffering? The War is long over, perhaps it’s time for a
lasting peace. The winner is the alliance with the most developed tiles (halve
a destroyed city’s tiles, rounded up).
Unfortunately, this imbalance may yet give rise to another conflict…
Other Important Information/Clarifications:
- A City can have no dice (zero). A City without resource dice cannot Spend or Charge, and if they take any Damage, it perishes.
- Resource Dice may be picked up only when you end your turn on them, unless otherwise stated.
- Each City has 1 Reroll per game, for dire circumstances or striking opportunities.
- All effects on a side of a City die must resolve before another may be used.
- That said, Alliances take their turns concurrently, so City die results may be resolved in whatever order the Alliance chooses, along with Main Phase choices.
- You lose expended dice and they are returned to the pile.
- You may choose to not spend, and likewise, not perform the action needing the cost.
- Unoccupied: A tile without a City on it.
- Undeveloped: A tile without a development or a resource die on it.
- You cannot develop on Lakes or Mountains.
- Upgrading the side of the City die that is facing up will not allow you to resolve a new effect.
- During the Main Phase: Move, Develop, and Upgrade each can only be used once. The Cassandra cannot perform Move, Develop, and then Move, for example.
- Ericston must still Spend 4 to Develop an opponent’s tile.
- The Cassandra’s tracks do not count towards occupation or development.
- You cannot infinite loop the City die because each side may only resolve once per player turn, unless otherwise stated.
Upgrade Pile Glossary
- Open Fire: Range 1-3, 3 Damage
- Barriers: +3 Armor
- Stockpile: Charge 2
- Secondaries: Range 1-3, 2 Damage, (→)
- Artillery: Spend 1: Range 3-4, 4 Damage
- Broadside: Spend 1: Range 1-2, 5 Damage
- Highrise: +2 Armor, (→)
- Evict: Range 2, Push a City, (→)
- Recycle: Charge 2 to one die, (→)
- Raze: Move 1, Gain a resource die on current tile, (↓) or (→)
- Pave: Move 1, Ignoring terrain, (↓) or (→)
- Support: Range 1-3, Give another City Charge 2, (←) or (→)
Unique Upgrade Glossary
Should you choose to play with them, each City has two unique Upgrades that they can choose from. Each City may only choose one of the two and can only do so after they have at least two other upgrades.
Ericston:
- Double Time: Move 1, Spend 3: Develop (spend 4 if developing an opponent’s tile), (→)
- Pathfind: Move 1, Pushing Cities, Charge 1, (→)
Biome 7:
- Forcefield: Spend X: Range 1-2, You and another City gain half X Armor (rounded up)
- Fusion: Charge All
Nautingham:
- Omni: (←) or (↓) or (→), This side may be resolved twice per turn.
- Sunder: Spend 3: Remove everything from an adjacent tile. If there was a City, Push it and deal 2 Damage ignoring armor.
Sangfroid:
- Cloud Breaker: Charge 1, Spend 4: Range 4 in a line, 4 Damage ignoring armor.
- Tracking Shot: Range 2-3, 3 Damage, (↓) or (→)
Aeres:
- Carpet Bomb: Spend 2: Move 3 in a line, 3 Damage
- Burners: Move 2 in a line, (←) or (→)
The Cassandra:
- Express: Spend 6: Refresh your City die and roll again
- Trail Blaze: Move 2, You may lay tracks along the way spending 1 each, (→)
Retail Estimate:
Assuming high build quality, meaning-
- Large plastic City Dice (6) and Upgrades (82+) that snap on and off
- Commissioned art for Cities, UI, Rulebook, map
- Thick cardboard used for board game pieces (Region tiles, Developments, City Cards)
- Card stock for Reminder Cards
- Plastic City Die Map Markers (4), and potentially 3D sculpted plastic City figures
- 36+ acrylic six sided dice
- Good inserts so that players don’t have to make their own (that’s a pet-peeve of mine)
This places the board game at around 30-35$USD for the base game (comparing with Catan, Dice Forge, not as big as Scythe or Monumental), an additional 20-25$USD for optional minis.
Planned DLC which include additional Cities (The Cassandra + others), 3v3 support, more dice, additional Region Tiles (and updates to older ones to include new gameplay elements) could come in for 20-25$USD (not including minis).
Other things of note:
Demographics-
The demographic of this game will be 16+ year-olds that seek a strategy board game similar to Catan but with much more player interaction. This game can appeal to a decently wide audience, but I need to test the limits. My next playtests will involve players who enjoy Catan but don’t have much experience elsewhere, or in competitive games.
Probability-
To start, every side of the die has a 1/6 chance of resolving. Cities have different starting dice, so the odds of landing an Open Fire can range from 3/6 to 1/6. It’s up to players how they want to change this statistic.
For example, Sangfroid starts with x3 Open Fire, x1 Barrier, x2 Stockpile.
3/6 Offense, 1/6 Defense, 2/6 Economy
Players might want to mitigate its defensive weakness by Upgrading and switching one Open Fire with a Highrise.
2/6 Offense, 2/6 Defense, 2/6 Economy
But right after, they might choose to get Support, switching out Stockpile, which is an Economy booster that has two arrows, and the player points it to Open Fire and Barrier.
3/6 Offense, 3/6 Defense, 2/6 Economy
The math is, of course, much more complex than that, but that’s how the results generally feel to a player: an increase to the chances of certain strategies appearing on a die roll.
Eventually you might even have a die completely covered in faces with arrows, in which case no matter what side you land on you’ll have a 100% chance at rolling all of your sides. Arrows are powerful, and so they’ve been balanced accordingly.
Other Thoughts-
Players start to think about “build order” and “build targets”, think about the game while not playing the game, strategizing and planning out the “perfect die”. Players also eventually notice the strategy triangle of Attack > Defense > Push.
Terminology like Support/Tank, Pusher, DPS, etc. all come up, along with more specific titles like Broadside-train, Farmer, Support-froid, etc. This is exciting and fascinating to me, as gamers tend to do this for a lot of strategy games to more effectively talk about certain strategies and playstyles.
“Easy to learn, hard to master” is a mantra that we all live by as game designers, and I think I hit the nail on the head here. I plan to further refine this idea and eventually launch a Kickstarter, should it still hold with more playtests.
